Check Out
You must check out a patient who has been examined.
In this process to check out a patient, you locate the patient details and then access, record, and change:
Set Appointment for next visit.
Give educational handouts to the patient.
Schedule appointment for lab and procedures.
Any other instruction to the patient.
To check out a patient:
1. In the home page, from the horizontal menu, click Home.
2. In the Scheduler widget, in the search field, enter the first name / last name / chart number of the patient.
3. Click Search.
The list of patients is displayed.

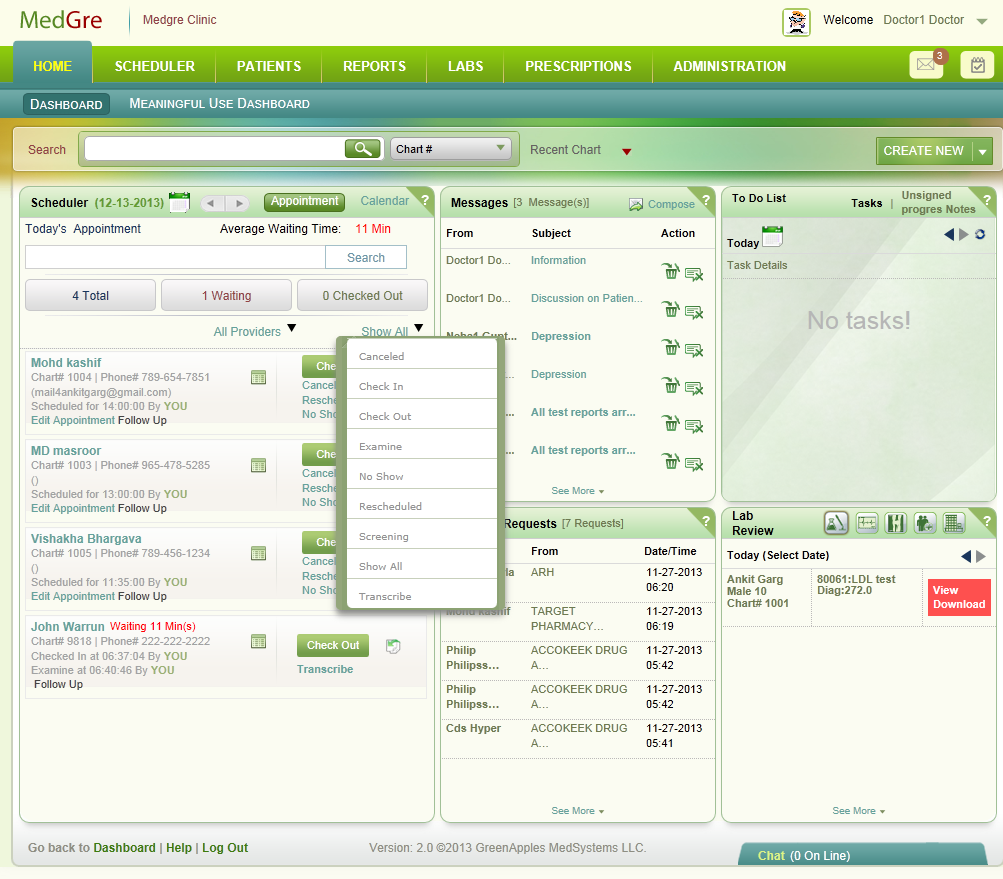
Fig 1: Patient Search Window
4. From the Show All drop-down list, select Check Out.
Only the details of patients to be checked out are displayed.
5. Scroll to locate the relevant patient.
Tip: If the list is long, click Next to move to the rest of the patient names.
6. Click Check Out next to the patient's name.
The Check Out popup is displayed.
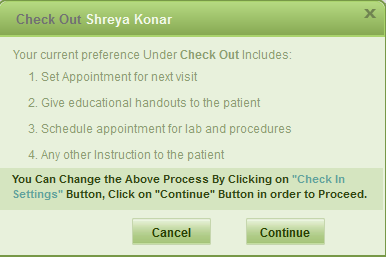
Fig 2: Check Out popup
7. Click Continue.
The Scheduler page is displayed for implementing the first step of the Checkout process - Next Appointment.
Note: The different processes (Next Appointment, Education handouts, Lab Appointments, Other Instructions) for completing Check Out are displayed along with check boxes at the top. On completion of the individual process, the check box against it is automatically selected. There is also a Done button that is provided.
Tip: (a) Though not recommended, the user may click the Done button to complete Check Out without completing any of the sub-processes (Next Appointment, Education handouts, Lab Appointments, Other Instructions). (b)Then, click Ok in the Confirmation popup. (c) You will then be directed to the Home page with the status against the appointment changed to Transcribe.
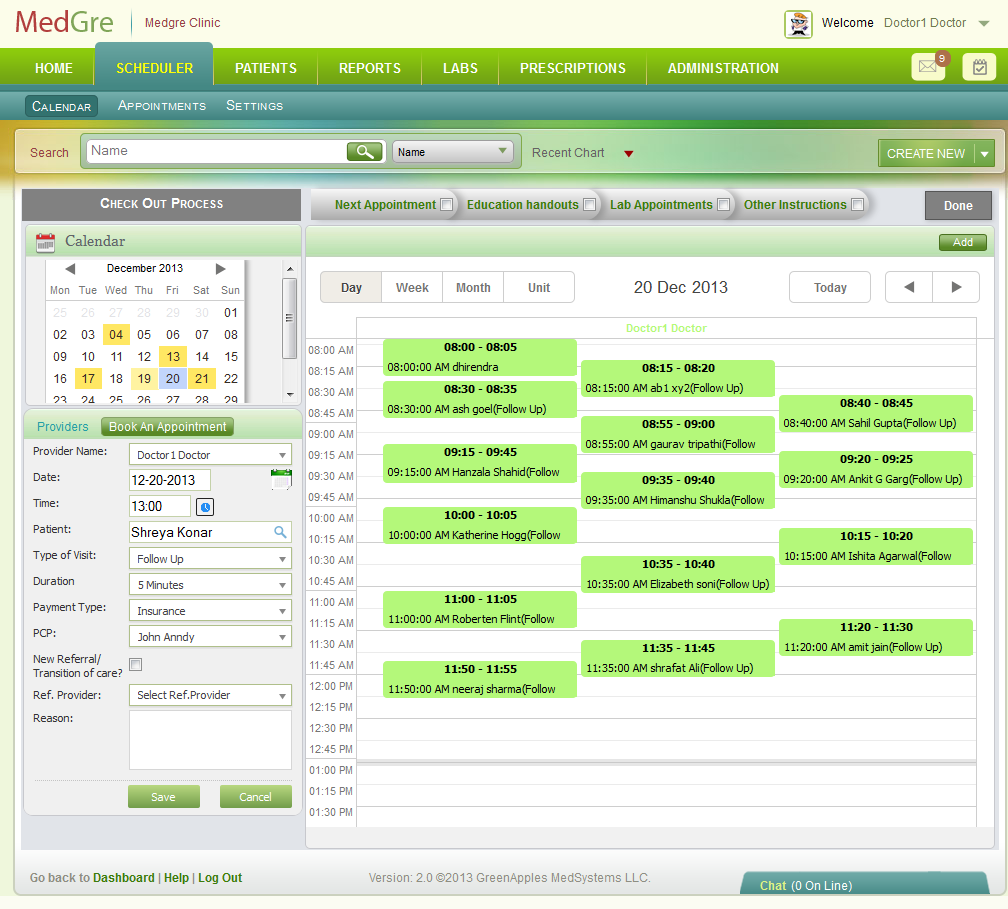
Fig 3: Scheduler page
Recording Information for Step 1: Next appointment
8. Under the Book An Appointment widget, select a Provider Name from the drop-down list. This field is mandatory.
9. Click the calendar control to select a Date for the appointment. This field is mandatory.
Note: The default date is calculated on the basis of the time duration set for the next visit during the examining process.
Note: The Calendar on the right displays the time slots for the day for the selected provider.
10. Check the time that is free and then click the time control to select the Time for the appointment. This field is mandatory.
11. The Patient name and Type of Visit fields are pre-populated. These fields are mandatory.
12. Select the Duration from the drop-down list. This field is mandatory.
13. Select a Payment Type from the drop-down list. This field is mandatory.
14. Select a Primary Care Physician (PCP) from the drop-down list. The PCP may be an external provider who has referred the patient. Or he may be a doctor in the clinic.
15. Select the New Referral/Transition of care? check box, if the patient is a new referral or transitioned for care by another clinic or provider.
16. Select the Ref. Provider from the drop-down list.
17. Enter Reason, if any.
18. Click Save to save the appointment details.
Brief messages are displayed stating that the status has been updated. The process check boxes are displayed above the Time calendar. The check box against the first process of Check Out - Next Appointment, is automatically selected.
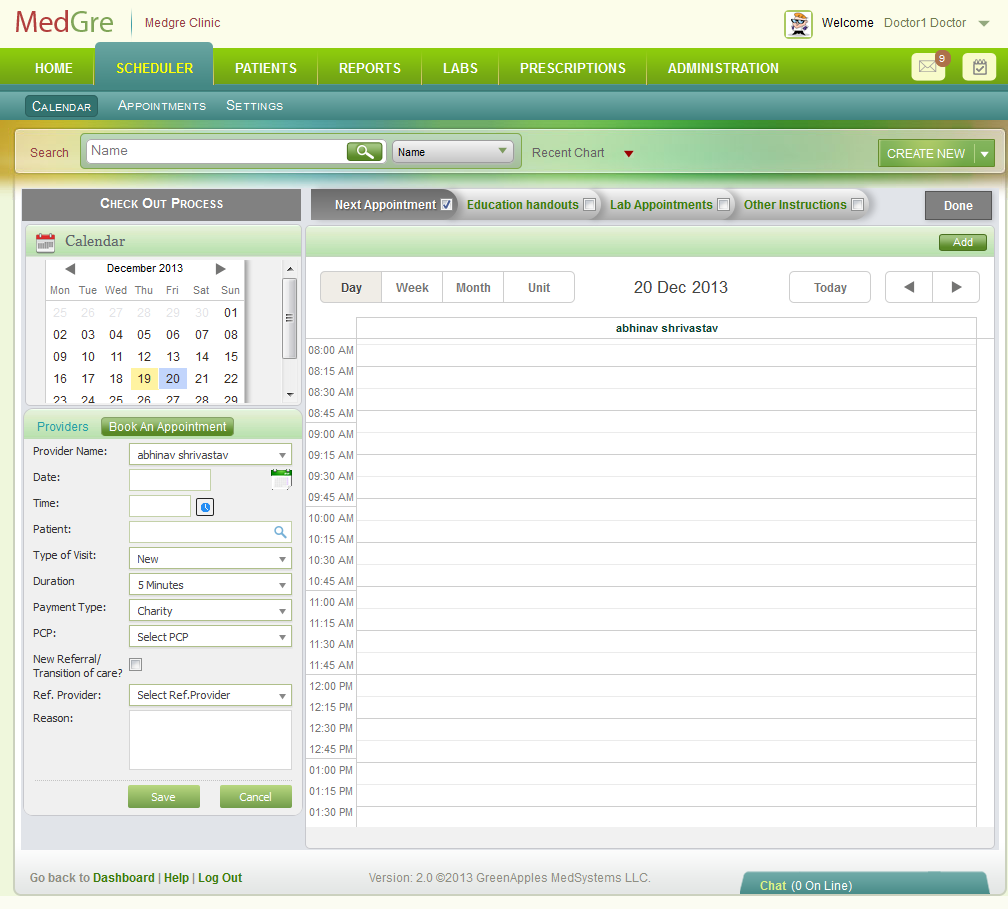
Fig 4: Appointment Added
Recording Information for Step 2:Education Handouts
19. Click Education handouts.
The Patient Chart is displayed with Education on the left menu selected.
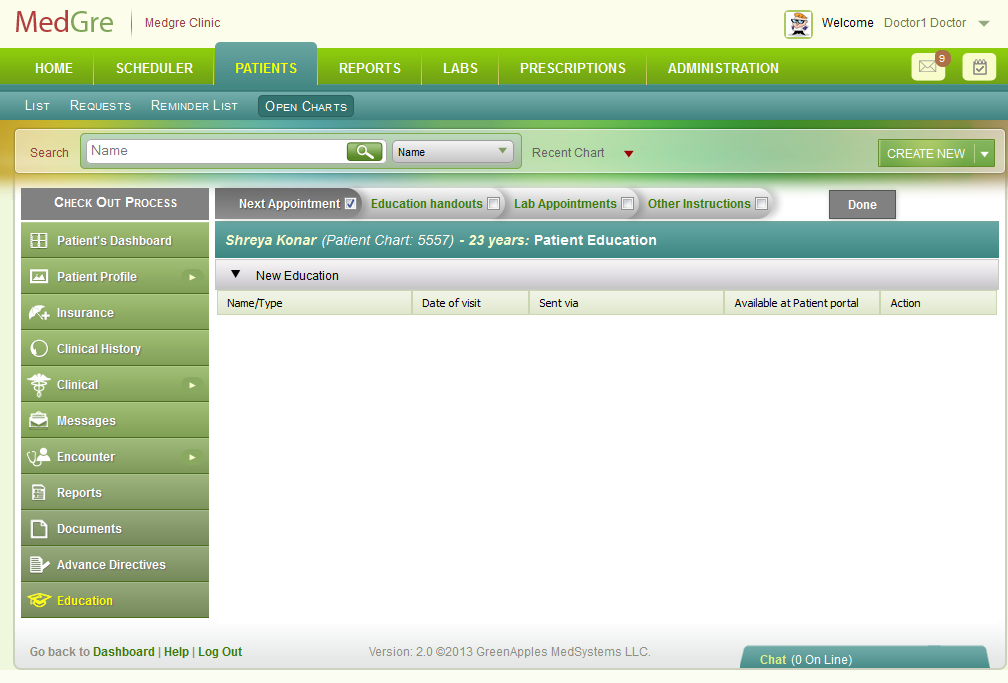
Fig 5: Education
20. In the Patient's dashboard, record/change the following details.
Education (Click the hyperlink to go to the Education section.)
21. On completion of the Education process, click Lab Appointments.
The Patient Chart is displayed.

Fig 5: Lab Appointment - Patient Chart
22. Select the Lab Appointments check box.
23. Click Other Instructions.
The Patient Chart is displayed.

Fig 6: Lab Appointment - Other Instructions
24. Select the Other Instructions check box.
25. To complete Check Out, click Done.
The Home page is displayed and the Appointment status changes to Transcribe.
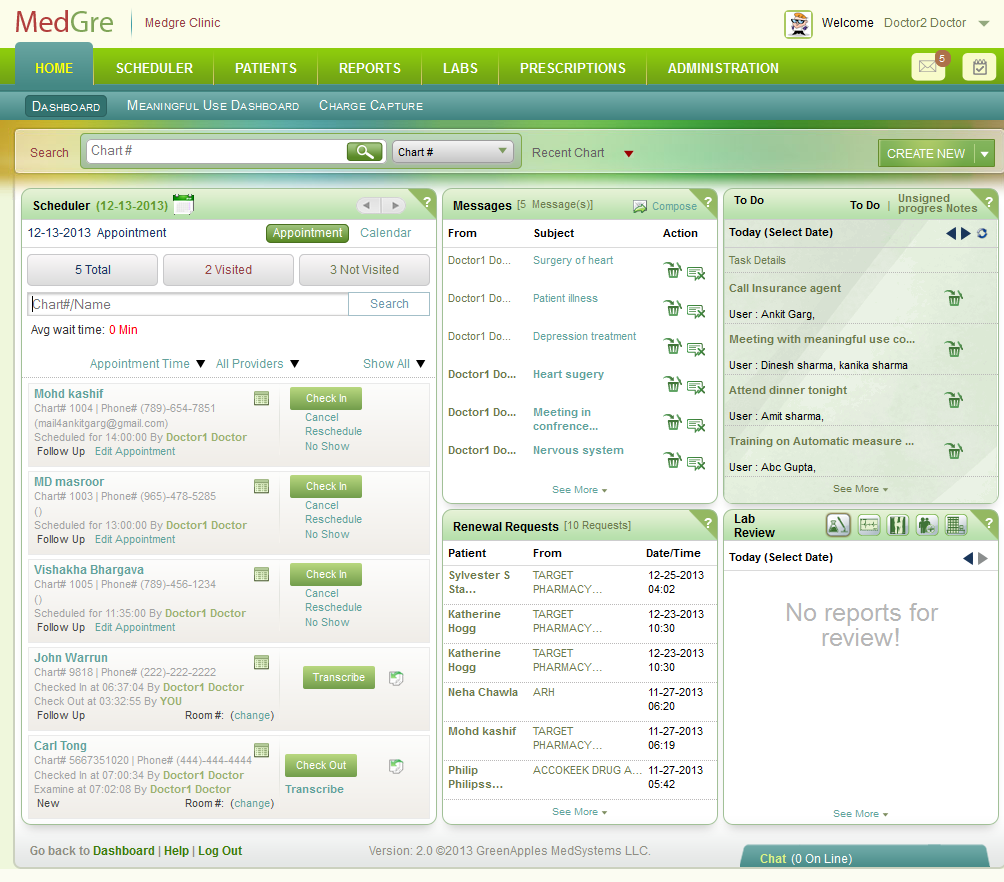
Fig 7:Transcribe status