
(Patients -> View Chart -> Clinical History)
In this section, information about patient's immunization and shots are managed. You may access, record, and change the details.
To access immunization and shots:
1. Use the main Search to search for a patient.
Fig 1: Search Results
2. In the search results, click View Chart.
The Patient Chart is displayed with the Patient Dashboard selected.
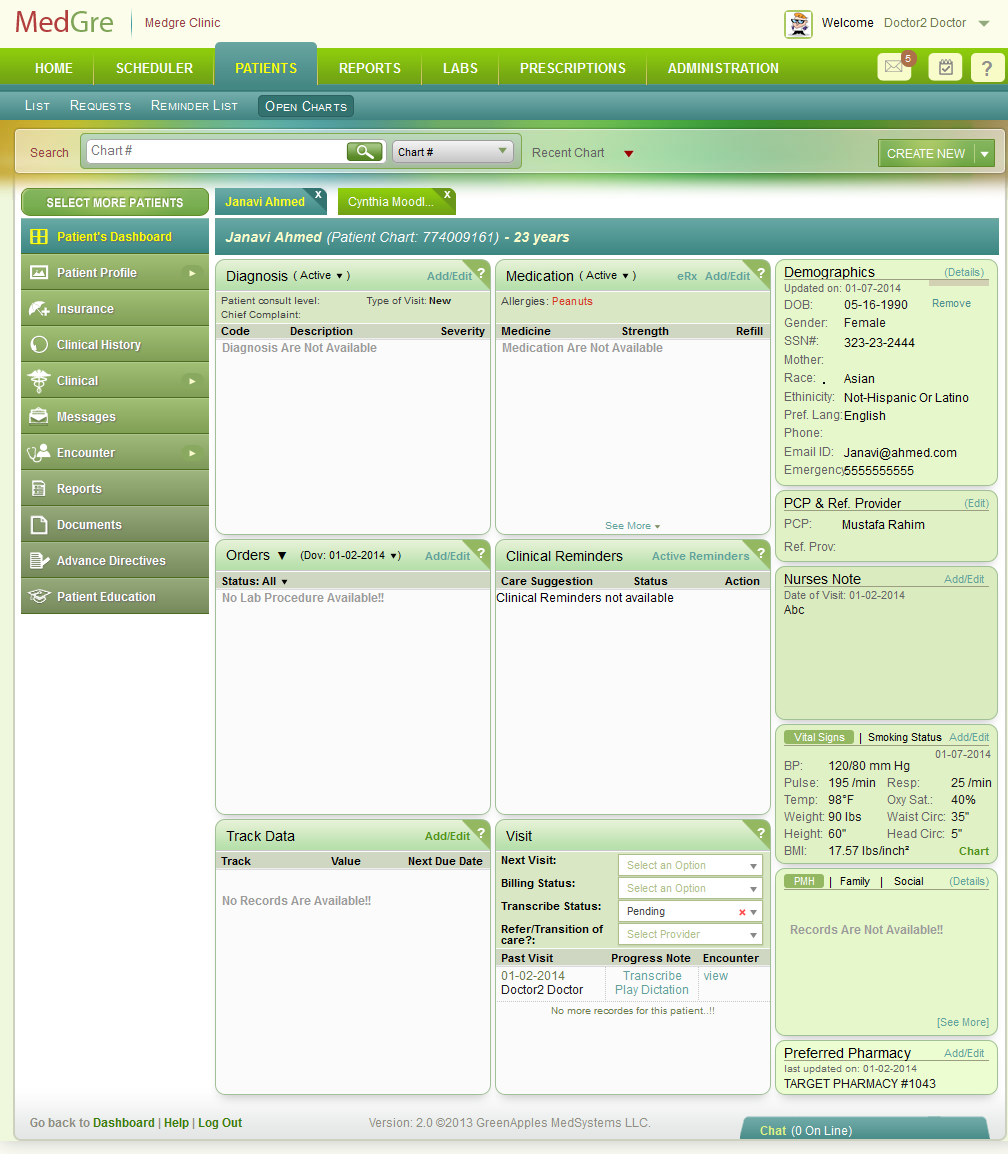
Fig 2: Patient Dashboard
3. From the left menu, click Clinical History.
The Clinical History window is displayed.
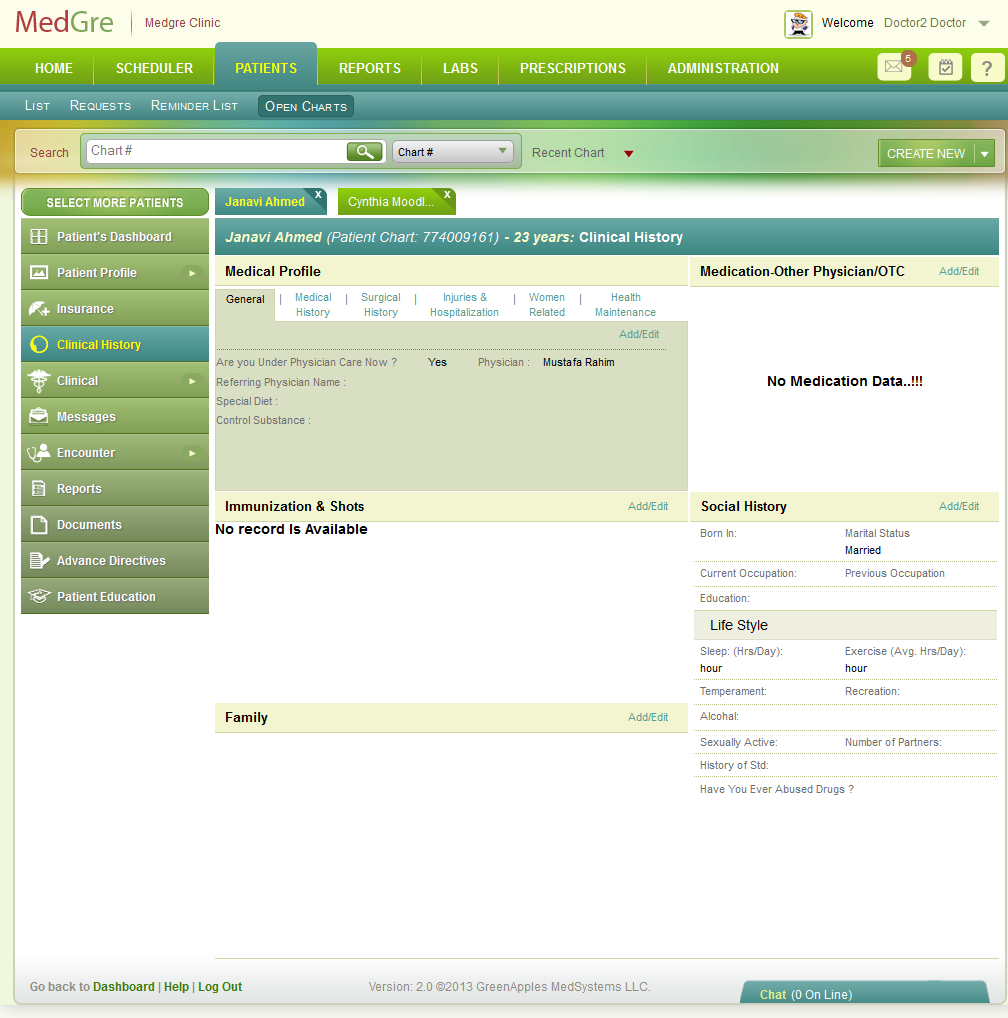
Fig 3: Clinical History
The Clinical History window is displayed. (The below image is displayed when you are in the Screening process).

Fig 4: Clinical History Screening
To enter immunization and shots:
4. In the Clinical History window, in the Immunization & Shots widget, click Add/Edit.
The Immunization popup is displayed.
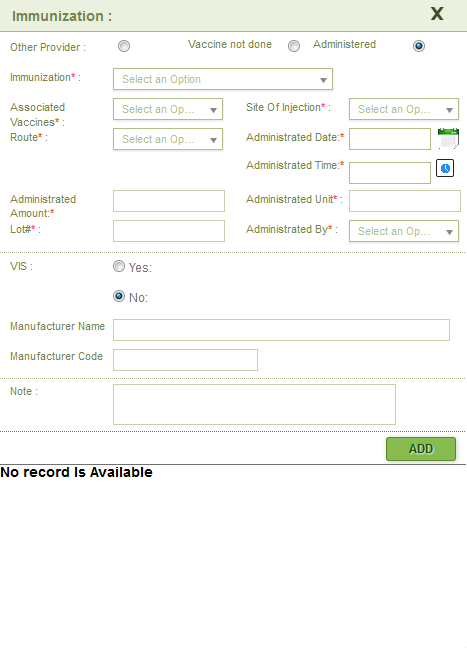
Fig 5: Immunization
5. Enter/select the following details:
Note: Field marked with red * are mandatory. The mandatory details may change based on the option selected (Other Provider / Vaccine not done / Administered).
| S.No. | Field Name | Field Details |
| 1. | Other Provider, Vaccine not Done, Administered | Select one of the options. |
| 2. | Immunization * | From the drop-down list, select an option. This is a mandatory field. |
| 3. | Associated Vaccines * | From the drop-down list, select an option. This is a mandatory field. |
| 4. | Site of Injection * | From the drop-down list, select an option. |
| 5. | Routine * | From the drop-down list, select an option. |
| 6. | Administrated Date * | Click the calendar control to select the date of administration. |
| 7. | Administrated Time * | Click the time control to select the time of administration. |
| 8. | Administrated Amount * | Enter the amount of vaccine administrated. |
| 9. | Administrated Unit * | Enter the unit of administration. |
| 10. | Lot# * | Enter the lot number. |
| 11. | Administrated By * | From the drop-down list, select an option. |
| 12. | VIS | Select either Yes or No. |
| 13. | Manufacturer Name | Enter the name of the manufacturer. |
| 14. | Manufacturer Code | Enter the manufacturer code. |
| 15. | Note | Enter notes, if any. |
6. Click ADD.
The details are displayed at the bottom of the window.
7. Click the ‘X’ symbol at the top right-hand corner of the window to close it.
The details are displayed in the Immunization & Shots window.
Tip: Click View or Detail to view the details.
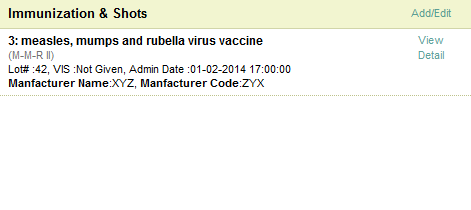
Fig 6: Immunization widget filled
(Back to Screening) (Click the hyperlink to go back to the Screening section.)