Create an Appointment for a Follow up Patient
In this process, to create an appointment for a follow up patient you select/create:
Provider
Date and time for the appointment.
Patient details
Type and duration of visit
Payment type
Details of Primary Care Physician and Reference
Reasons
To create an appointment for a follow up patient:
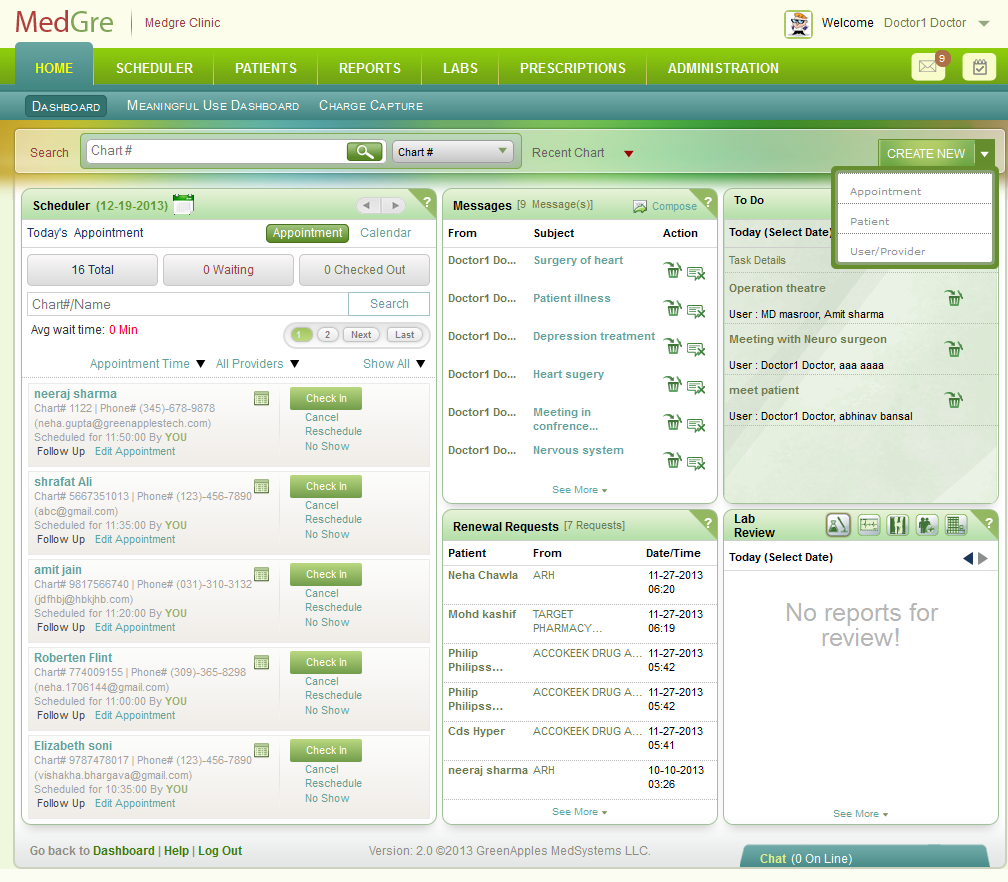
1. In the home page, (a) from the CREATE NEW drop-down list, (b) select Appointment.
Fig 1: Home page
The details of the Scheduler > Calendar page are displayed.
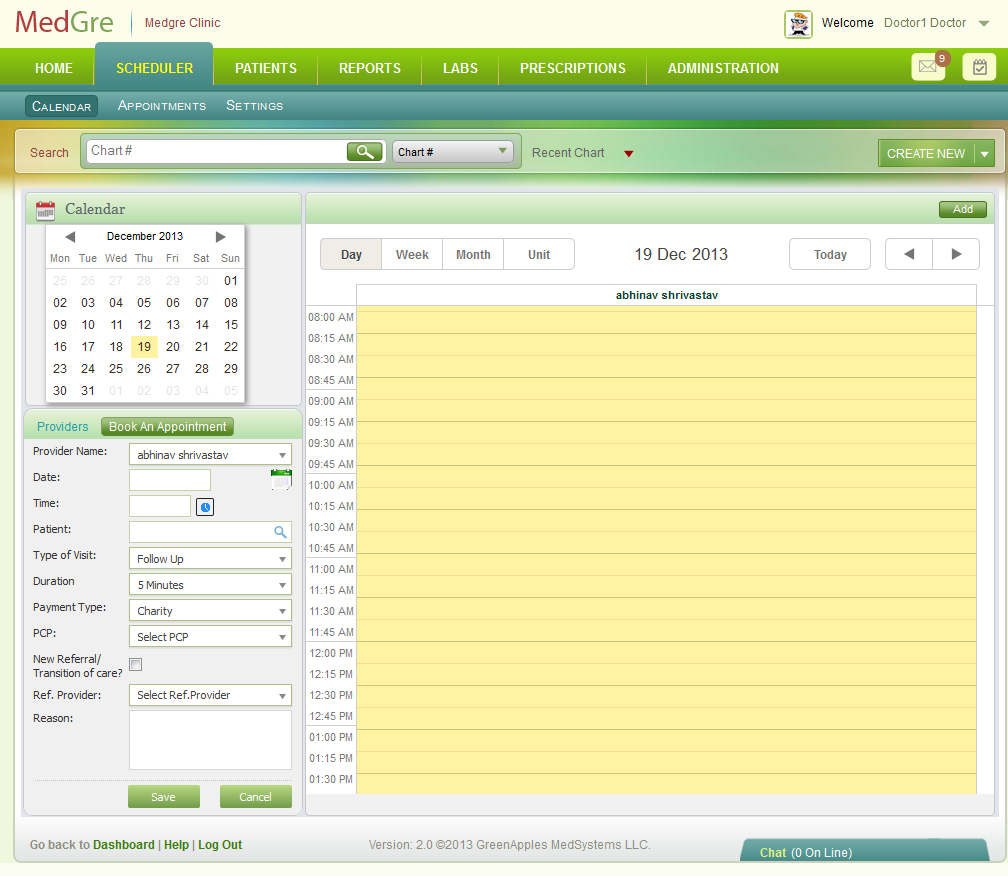
Fig 2: Book an Appointment group box
2. Under the Book An Appointment widget, select a Provider Name from the drop-down list. This field is mandatory.
3. Click the calendar control to select a Date for the appointment. This field is mandatory.
The Calendar on the right displays the time slots for the day for the selected provider.
4. Check the time that is free and then click the time control to select the Time for the appointment. This field is mandatory.
5. Click the hand lens image to search and select a Patient.
A popup to search and select the patient is displayed.
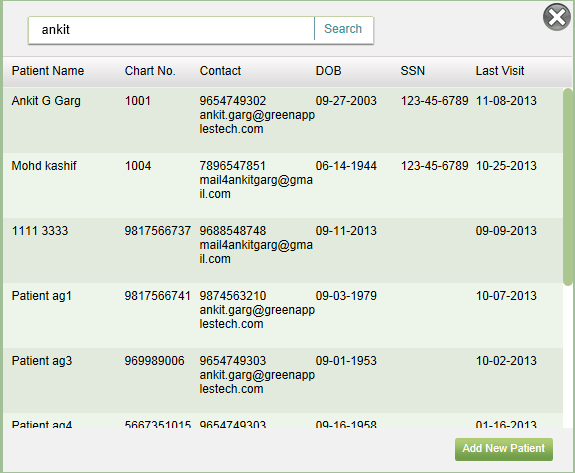
Fig 3: Patient Search Window
Enter the first name / last name / both / chart number and click Search.
Select the patient’s name. It will be displayed in the patient’s field under the Providers group box.
6. Under the Book an Appointment widget, select Type of Visit from the drop-down list. This field is mandatory. For a follow up patient, the default will be Follow Up.
7. Select the Duration from the drop-down list. This field is mandatory.
8. Select a Payment Type from the drop-down list. This field is mandatory.
9. Select a Primary Care Physician (PCP) from the drop-down list. The PCP may be an external provider who has referred the patient. Or he may be a doctor in the clinic.
10. Select the New Referral/Transition of care? check box, if the patient is a new referral or transitioned for care by another clinic or provider.
11. Select the Ref. Provider from the drop-down list.
12. Enter Reason, if any.
13. Click Save to save the appointment details.