
(Patient Chart -> Clinical -> Prescription)
This section covers the medication prescribed for the patient. You may access, record, and change the details.
To access prescription details:
1. Use the main Search to search for a patient's details.
Fig 1: Search Results
2. In the search results, click View Chart.
The Patient Chart is displayed with the Patient's Dashboard selected.

Fig 2: Patient Chart
You see the Medication widget on the Patient Dashboard.
Note: You can access the main Prescription window, by clicking Prescription under Clinical, from the left menu.
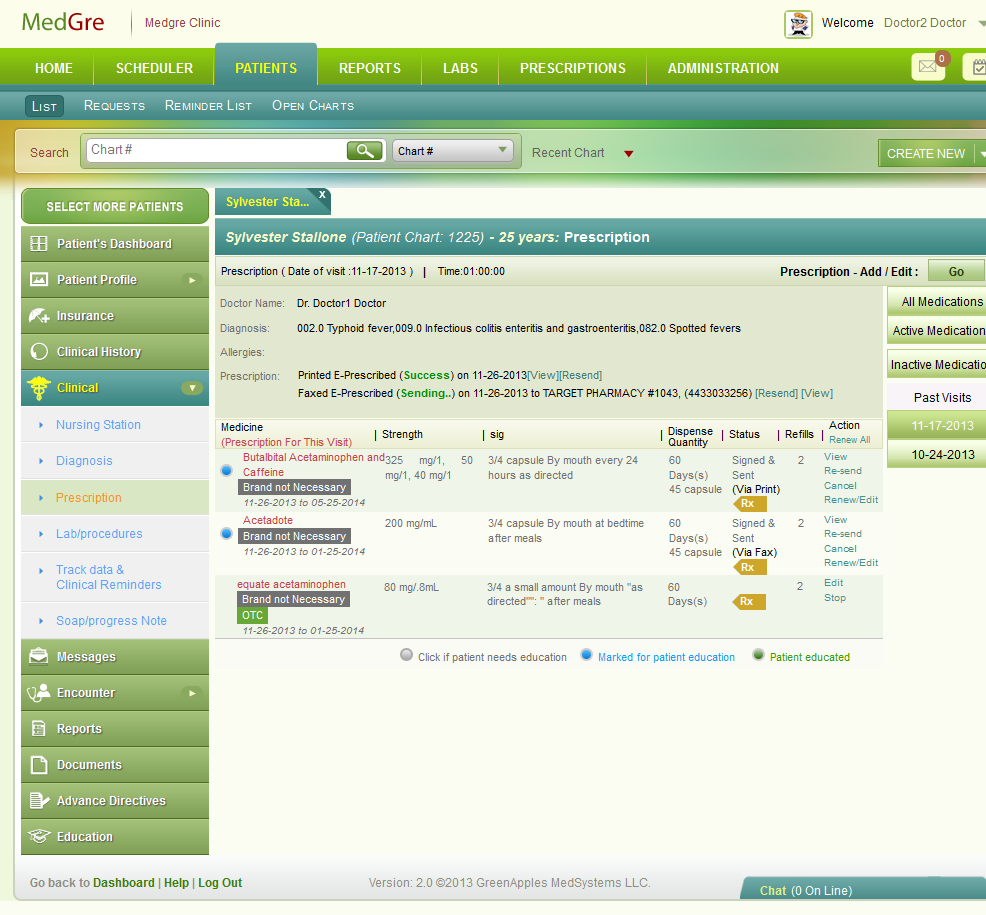
Fig 3: Prescription Main Window
To record and change prescription details:
The Patient Chart is displayed with the Patient's Dashboard selected. This screen is displayed when you are in the examining process.

Fig 4: Prescription window (Examine)
3. In the Patient Dashboard, in the Medication widget, click the drop-down next to the title (Medication). It provides the following options:
Active: To view the details of active medications.
Different Dates of Visit - To view the active medication prescribed to the patient during earlier dates of visit.
4. In the Patient Dashboard, in the Medication widget, click Add/Edit.
The Prescription popup is displayed.
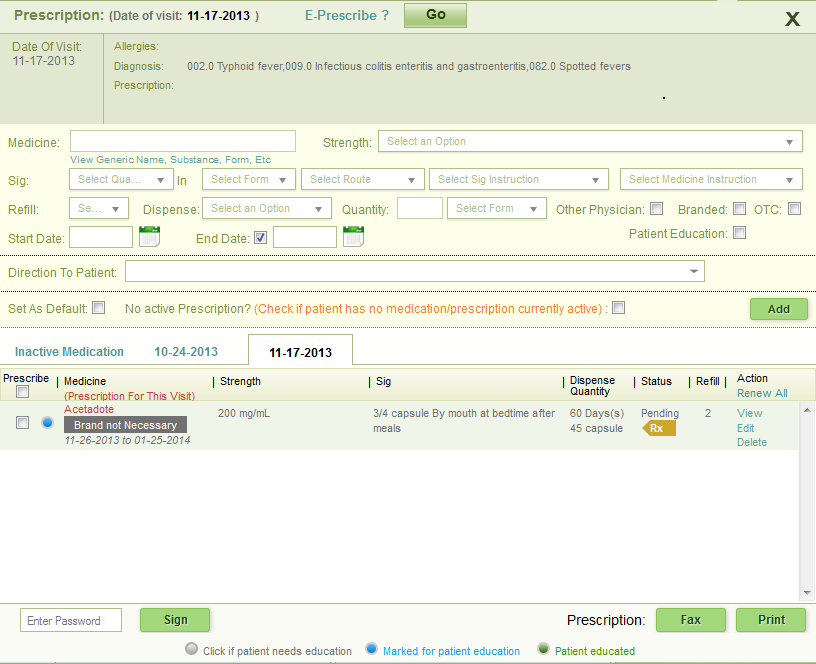
Fig 5: Prescription popup
The popup comprises:
Top grey section
First column displays the date of visit.
Second column comprises:
Allergies: Displays details of allergies related to the patient.
Diagnosis: Displays details of diagnosis done during the visit.
Prescription:Will be populated with details once the medicine is prescribed.
Middle yellow section - Details are provided in the table below:
| S.No. | Field Name | Field Details |
| 1. | Medicine | Enter three
alphabets from the name of the medicine. From the list displayed,
select the medicine.
Click the View Generic Name, Substance, Form Etc. link to view the details of the medicine. |
| 2. | Strength | Select an relevant value from the drop-down list. |
| 3. | Sig | Sig is the directions for use
of the medicine.
It comprises:
So,Sig for example is “1 tablet by mouth every morning before exercise”. |
| 4. | Refill | Select a value from the drop-down list. The selected value stipulates the number of times that the patient can purchase the medicine after the end date of the current prescription. |
| 5. | Dispense | Select the period for the medicine from the drop-down list. |
| 6. | Quantity |
|
| 7. | Other Physician | Select the check box if the medication has been prescribed by another provider. |
| 8. | Branded | Select the check box if only a branded medicine has to be administered to the patient. |
| 9. | OTC | The check box is automatically selected based on the medicine selected. The selection indicates that the patient can buy the medicine from over the counter. |
| 10. | Start Date | Click the calendar control to set a date of start for the medicine. |
| 11. | End Date | Select the check box if a end date has to be set. Then, click the calendar control to select an end date for the medicine. |
| 12. | Patient Education | Select the check box if the patient needs to be educated about the medicine. |
| 13. | Direction to Patient | Record if any directions needs to be given to the patient. You may select an option from the drop-down list too. |
| 14. | Set As Default | Select this check box to save the details as a template. |
| 15. | No active prescription? | Select the check box if the patient has no currently active medication/prescription. |
5. Click Add.
The details are displayed in the table (in white color) given below, under the selected date of visit tab.
Note:
Fig 6: Prescription popup filled
The Action column comprises the following statuses:
6. To prescribe the medicines added above:
The status changes to Signed. Earlier the status is displayed as Pending.
Select the Prescribe check box against the medicine. You may select all too by selecting the overall Prescribe check box.
Click Fax or Print. These buttons are enabled only after you click Sign.
Note: If there occurs any Controlled Substance medicine(s), then each of these is to be prescribed separately.
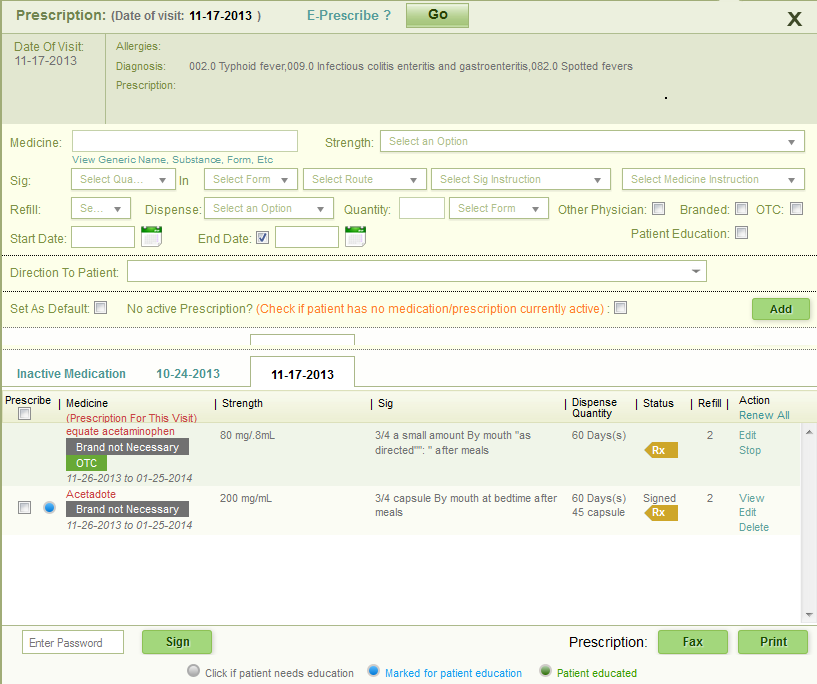
Fig 7: Prescription popup Print/Fax
7. Fax / Print
When you click Fax, the Fax popup is displayed.
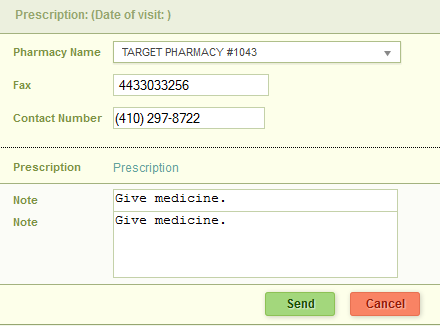
Fig 8: Fax popup
Select the Pharmacy Name from the drop-down list.
The Fax and Contact Numbers are automatically populated.
Enter Note if any.
Click Send.
Tip: Click Cancel to discard the details.
A message is briefly displayed confirming the sending of the fax. The status now changes to Signed & Sent.
When you click Print, the prescription is displayed and prompts you to save it in PDF format.
The status changed to Signed & Sent.
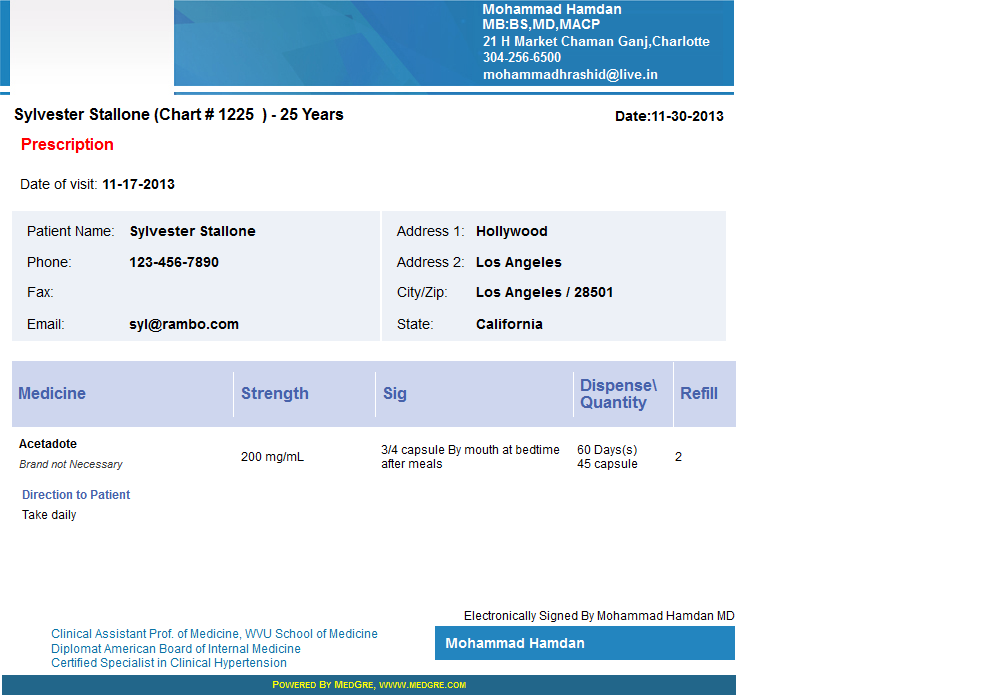
Fig 9: Prescription report
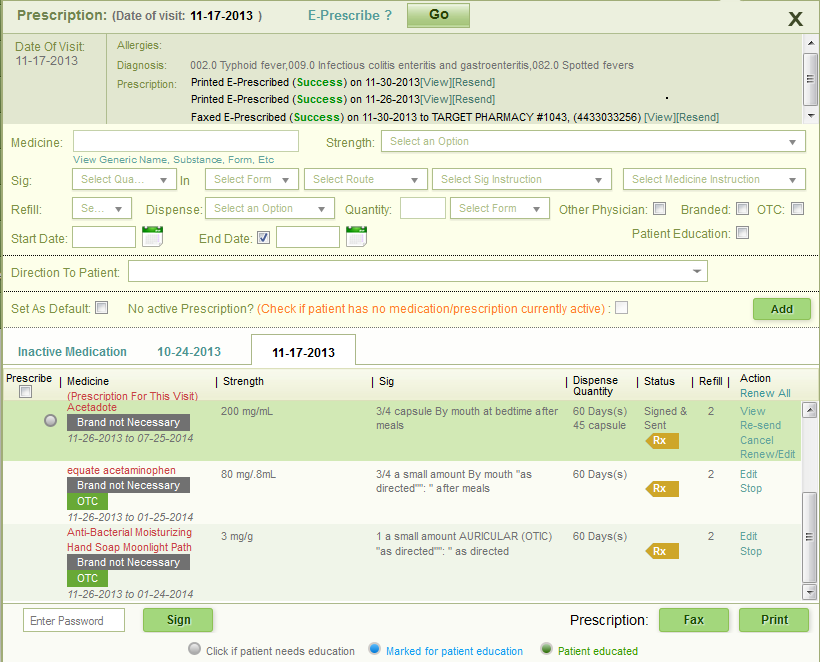
Fig 10: Status after Prescription report
8. Click the 'X' symbol at the top right hand corner of the Prescription popup to close it.
The details are displayed in the Medication widget.
9. Click See More.
The Prescription window is displayed.
Note: The below window is displayed when you are accessing/recording/changing medication as a standalone process.
Fig 11: Prescription window Examining
Note: The below window is displayed when you are accessing/recording/changing medication from as part of the examining process.
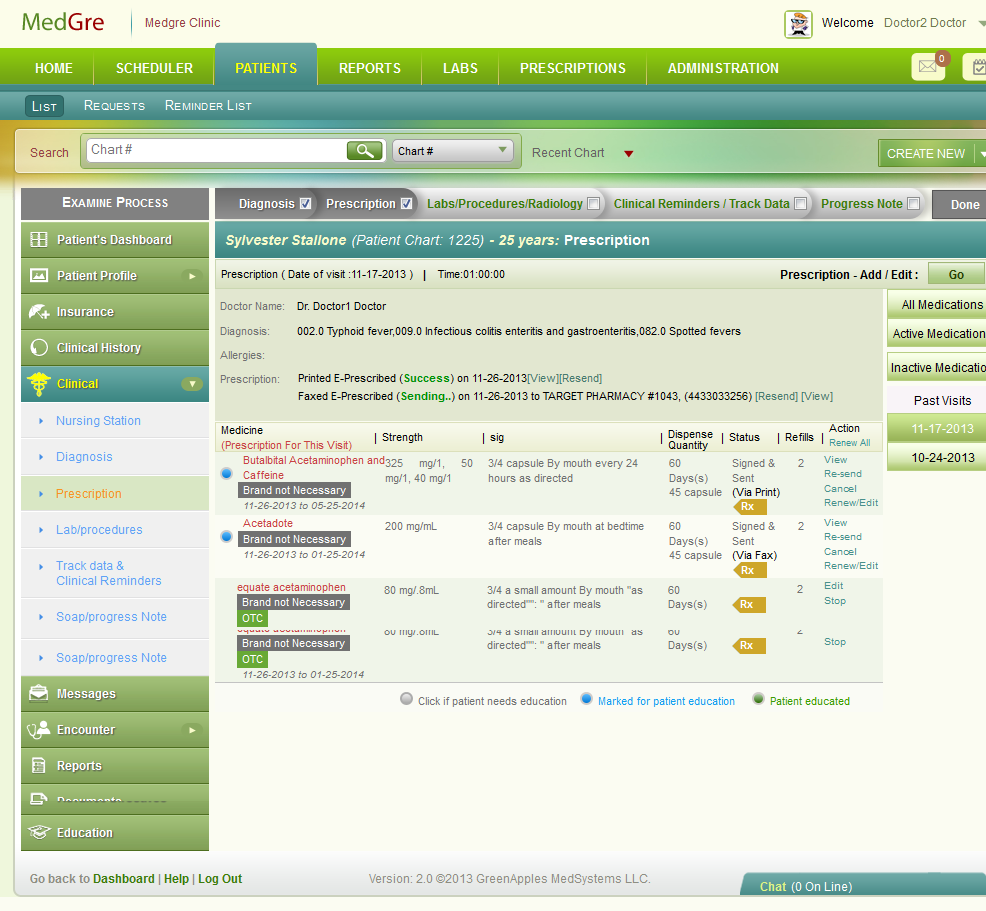
Fig 12: Prescription window
10. In the Prescription window, from the right menu:
Click All Medications to access details of all medications (Active, Inactive, Resolved).
Click Active Medications to access only medications that are active.
Click Inactive Medication to access inactive and resolved medications.
Click dates listed under Past Visits to access details of medication of a particular date of visit.
The Prescription window, displays:
Medicine - Displays the details of the medicine.
Strength - Details the strength of the medicine.
Sig - Indicates directions for use of the medicine.
Dispense Quantity - Indicates the total duration and quantity of the medication.
Status - Displays the status of the medication.
Refills - States the allowed refill for a medicine.
Action - Allows to view, re-send, cancel, and renew/edit the medicine details by clicking Edit.
Tip:
Click Prescription - Add / Edit: Go to change the medication details.
Note: If you have reached this page from examining, click the below hyperlink to go back to Examining.
(Back to Examining) (Click the hyperlink to go back to the Examining section.)